
So, you find yourself in a wilderness survival scenario. Most often these situations occur when somebody is hiking, camping, hunting, or fishing. Any activity that takes place in the wild can end up in disaster. Maybe a hiker leaves the trail and gets lost. Perhaps a hunter stays out in the wilderness past dark. Heaven forbid a storm blows in and strands a family that is camping. Any of these situations can be life threatening. However, with the right mindset and knowledge you can make it out alive.
Once you realize you are stuck in the wild, the first thing to remember is to stop and stay calm. The absolute worst thing you can do is to panic. Often when people panic in the wilderness, they start trying to hike their way out with no idea which direction they are going. This will likely move you deeper into the wilderness and further from help. Stop what you are doing and asses your situation. Typically, the best course of action is to stay put and wait for help to come. This is assuming that somebody knows where you are and when you were supposed to be home. Always make sure you inform somebody of this information before you leave.
Next, you need to decide how you will use your time and energy. Instead of just sitting there, you should always be improving your situation. The four pillars of survival are food, water, fire, and shelter. These are the survival elements that are vital to keep you alive long term. To put these in order of importance, look at the rule of 3’s. The rules of three states that you are capable of surviving 3 weeks without any food, 3 days without any water, and 3 hours with no warmth from a shelter or fire.
This makes fire and shelter your top priority. However, building a shelter can take hours, and you may not have that much time before it gets cold or dark. A faster option is to build a survival fire. This can be done in just minutes if you know what you are doing. Fire also provides an abundance of benefits. In addition to providing warmth, fire can light your camp, cook food, purify water, and keep away predators. The smoke can be used for signaling, to kill bacteria, to preserve meat, and to ward off insects. The charcoal and soot can be used to brush your teeth, clean metals items, settle your stomach, protect against the sun, or camouflage your skin. In this article, we will cover the ways to build and start a quality survival fire.
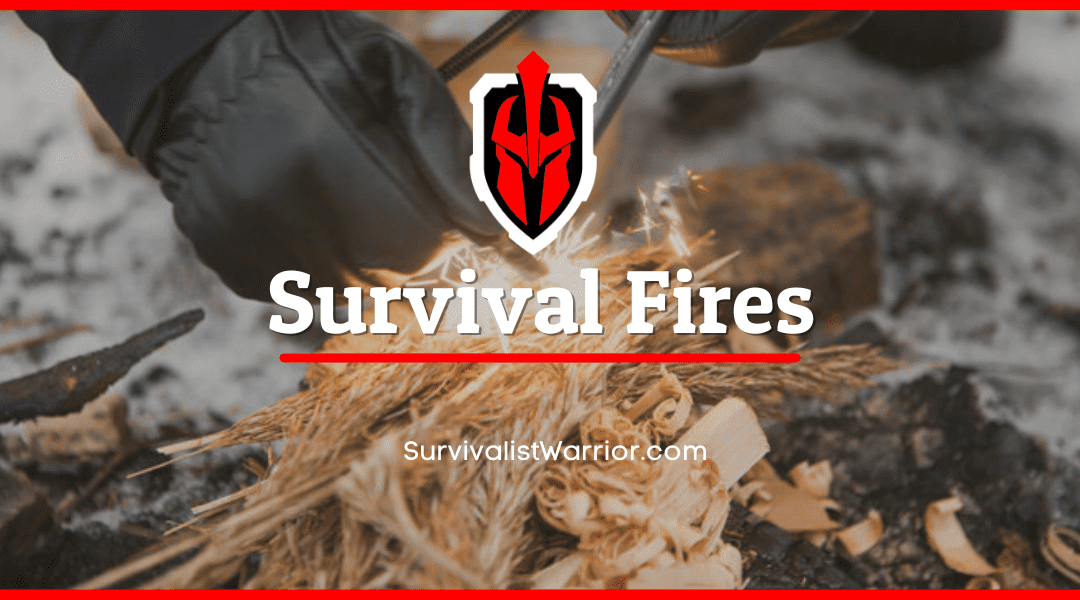
Collecting Supplies
The first step to any good survival fire is collecting all of your supplies. I cannot emphasize this enough. The worst thing you can do is to get a fire going only to run out of wood and let it die. I learned this the hard way on my first survival challenge. It was getting dark quickly, so I just gathered a small pile of wood and started my fire. The sun went down while I was starting the fire. Finally, I got the fire started. However, within an hour I was out of wood. It was too dark to venture out looking for more, so the fire went out quickly. It started raining, and I ended up in the early stages of hypothermia by morning. Do not make this mistake.
There are two pieces of advice that I have been given for collecting firewood. One is that you want enough tinder to wrap two hands around, enough kindling to wrap two arms around, and enough fuel wood to stack up to your knee. The other is to collect the amount of wood that you need and then double it. Both have served me very well. Keep in mind that the coldest part of the night is early morning. That means that your fire needs to make it all night if you really want to stay warm. It takes a large amount of wood and a good structure to accomplish this.
When collecting supplies, always start with tinder. Your tinder bundle is the fine and fluffy material you will use to actually light the fire. You must be particular about this material. If it is too thick or too wet, it will not light. In dry conditions, shredded dry leaves or dried grasses could work. However, a better bet is to go after tinder sources that will work even when wet. A bird’s nest is often bundled tight enough that most of the material is dry. The fluff inside a cattail head will be dry as the shell sheds all of the water. You can use a knife to make a pile of fine wood shavings. In addition, adding evergreen resin will help with any tinder. Evergreen resin has a chemical that is highly flammable and waterproof.
You should also never overlook artificial options. When I head into the wilderness, I always take a few WetFire cubes. These waxy cubes can be lit in any conditions. They are windproof, waterproof, and will light with only a spark. FireStix are a waxy stick soaked in accelerant. These will stay lit as long as 20 minutes even in the wind and rain. These two products are a lifesaver in bad weather conditions. For homemade fire starters you can dip cotton balls in petroleum jelly or shove dryer lint into a toilet paper tube.
Adding liquid accelerants can help with any tinder. These include gasoline, lighter fluid, kerosene, alcohol, or any other flammable liquid. This saved my life on one survival challenge. I had been trying to start my fire for hours with no luck. I had only a ferro rod, and all of my tinder was wet. It was getting dark, and I was desperate. Then I remembered my poison ivy treatment. I keep it with me because I am highly allergic. I remembered that the product was alcohol based. Quickly I ripped off a piece of the sleeve of my shirt and doused it in the product. A few sparks later I had a fire and was set for the night.
After you collect your tinder materials, it is time for kindling. This is the small to medium sized sticks that will be used to get the fire going. Always try to collect your kindling from up off the ground. Kindling on the ground is more likely to be damp. You are looking for dry sticks that will snap in two when bent. If you can find dead sticks still attached to a tree, this is ideal. The interior branches on evergreen trees are especially good since they often have some resin content.
Finally, you will need some fuel wood. These are the larger logs that will keep your fire going all night. Fuel wood should range from two to four inches thick. Anything thicker than that should be split to bring it down to size. Pieces should be no more than 2 ½ feet long. This means either cutting it down with a saw or breaking it. The best way to break anything this thick is between two trees close together. Place the wood in between the trees and then walk forward to apply pressure until it breaks. This is much safer than stomping on it or trying to break it over your knee. Again, try to get your fuel wood from up off of the ground so it is less likely to be damp.
Fire Structures
Even if you have all of the right supplies, an improper fire structure will not work. Just throwing everything in a pile is not ideal. A proper fire structure serves a particular purpose which is accomplished by oxygen control. Here are the structures I have found to be effective:
Teepee Fire – This is often the first fire structure a person learns. It is designed to give you a fast, large flame that is good for cooking, lighting your camp, or purifying water. However, it burns fast and is not ideal for staying warm all night. Start by placing your tinder bundle in the center. You want to shape it like a bird’s nest if you need to catch sparks. Then create a small teepee with your smallest kindling. You can lean it against the tinder bundle if needed. Then, add a layer of slightly larger kindling. Keep building up the layers while ensuring that the structure is solid and the weight is balanced. Finally, add a layer of the smallest fuel wood you have. Be sure to leave a gap in your teepee so you can reach your tinder bundle. Light the bundle and then add more fuel wood as needed.
Log Cabin Fire – This is another common structure that burns about the same as a teepee fire. You start the structure the same way with a small teepee at the center. Then, place a fuel logs flat on the ground on either side right next to the base of the teepee. Next, place two logs on top of the first two but perpendicular to create the next layer. Keep layering like a log cabin until the structure is above the top of the teepee. Once the teepee is lit, it will catch the fuel logs on fire. This will last a bit longer than a teepee fire before you have to add logs.
Top Down Fire – This fire is designed to burn long and slow to keep you warm all night. It has a small flame so there is plenty of warmth, but not much light. Instead of lighting it at the bottom and letting the flames rise, you light it at the top and let it slowly burn down. If done right, you will not need to add any fuel logs all night. Start with a layer of your largest fuel logs laid side by side. Then, pack dirt or sand into the cracks in between the logs to control the air. Add another layer of slightly smaller logs perpendicular to the first layer. Pack the cracks again. Keep doing this as high as you can without any risk of it tipping over. Then build a small teepee on top and light it.
Two Log Fire – This fire is also designed to last all night with little light but steady heat. Lay down a large log at least six feet long and at least six inches thick. Then lie an identical log on top. You can drive a metal spike through both into the ground or drive wooden stakes on both sides along the length of the logs. Finally, stuff the crack between the two with tinder and light. The logs will burn nice and slow. It is perfect to sleep next to with no need to add wood.
Dakota Fire Pit – This design is intended to hide your location if you are on the run. Start by finding a tree with low hanging branches. Dig two holes about four to six inches apart. Make them at least a foot across and around two feet deep. Then, dig a tunnel between the two at the base of the holes. Build a small teepee fire in the base of one hole and light. The fire will draw oxygen from the other hole, and flames should not reach higher than ground level. You can build a grate across the top for cooking or purifying water. As the smoke rises, it will be dissipated by the low branches of the tree above. You can add rocks around the pit to ensure the flames are even less visible.
Fire Starters
Once you have your supplies collected and your structure built, it is time to light the fire. However, all fire starters are not created equally. You have lots of different options, so we will cover the pros and cons of each.
Matches – This option is one of the most common as they are super cheap and each to purchase anywhere. However, most matches are not ideal. They blow out easily with a little wind, and they are worthless when wet. Paper matches are the worst. Wooden matches are slightly better. However, you can purchase waterproof matches. These have a waxy coating that allows them to get wet and still work. However, they still do not work when windy.
Lighters – This is another very common option. If you are going to go cheap, Bic lighters are the way to go. They are fairly reliable and inexpensive. Bics are not windproof or waterproof and cannot be refilled, but they are cheap enough to buy several for your pack. Torch lighters can be refilled and are windproof but must have a particular type of gas. Electric arc lighters are windproof but need a power source to recharge. The best option is a Zippo lighter. It is windproof, very reliable, and can be refilled with any flammable liquid. I typically keep a Zippo and several Bic lighters in my pack.
Ferro Rods – This is the best option by far. Ferro rods are windproof, waterproof, and shoot out sparks at about 3000F. You can get about 10,000 strikes out of a typical ferro rod. There is absolutely no fuel required. The only downside is that not all tinder will light with a spark. Therefore, you must be careful to find the right kind of tinder. I keep at least two ferro rods in my pack in case I lose one.
Lenses – You can get a fire started with a lens in the right conditions. Direct sunlight is absolutely necessary. This means getting out of wooded areas. It also means no cloudy days. You will need to adjust the angle and the distance between the lens and the tinder to produce a very small focal point. Hold it completely steady and you will eventually see smoke. After a while you will have a small ember that can be coaxed into a flame. You can take a lens with you like I do, or you can get one out of your binoculars, cameras, or glasses. Lenses can be made with water filled plastic bags or ice, but they do not work nearly as well as glass.
Piston Starters – These fire starters are not very common, and do not work when wet. A hollow piston is filled with fine tinder and slammed into a receiver. The compression of the air creates enough heat to turn the tinder into an ember. That can then be transferred to a tinder bundle to create a flame.
Friction Fire – There are several different types of friction fire, and they are all very difficult. You must have the perfect type of wood, and it must be completely dry. I have seen people spend days trying to start a fire this way. I suggest you avoid it unless you have no other option. The bow drill is the most common way to create a friction fire. Under your foot you have a fire board with an indentation carved near the edge. A notch is also carved in the side of the indentation. A spindle is placed in the indentation. This is a thick stick with a rounded end designed to create the friction. A handhold made of wood or stone is place on the other end of the spindle and held with your left hand. In your right hand is a bow or curved stick with cordage stretched between the two ends. The cordage is wrapped around the spindle. As you drive the bow back and forth it spins the spindle creating a fine power of sawdust at the base of the spindle. Eventually that might get hot enough to create an ember if you are lucky.
As you can see there are lots of different ways to build and start a fire. My suggestion is that you master several of them and keep supplies handy. Do not just read this article and assume you can build a fire when needed. In my first winter survival challenge the temperature was around 20F, and I spent most of the day building my shelter. About an hour before dark I collected my supplies and started building my fire. I tried to light my tinder, but the snow had made it damp.
Attempt after attempt failed. As the sun set, I did not look forward to my evening. Temperatures dipped down to -1F and I had no tent, no fire, and no sleeping bag. The winds ripped through my shelter at 20 mph. By 1am my internal body temperature was just above 95F and I was experiencing the symptoms of hypothermia. It was the first time I had to tap out from a challenge because I knew I would not survive.
Do not make the mistake I did and become overconfident based on knowledge alone. Take the time to practice different fire structures and to practice with different fire starters. At first, get out in your back yard or fire pit to practice. Then, go hiking in an area that allows campfires or go on a camping trip. Practice in dry conditions at first, but then move to wet or snowy conditions. Start on a calm day and then move to windy days. Challenge yourself to become a fire expert. Only then can you be confident you can build a fire when it might save your life.

Ryan Dotson is a survivalist, writer, photographer and prepper. Mr. Dotson was raised in the Ozark Mountains. His interest in survivalism began with the Boy Scouts. His father, uncle and grandfather continued to teach him how to hunt and fish. Currently living in Mid-Missouri, Mr. Dotson has begun to write about his experiences of survival here at SurvivalistWarrior.com.